RPak Modding
What Are RPaks/Starpaks?
.rpak files are a file format created by Respawn as the main way to store and load in-game assets, such as textures, materials, datatables, animation recordings, etc.
The assets in the .rpak file are kept stored in memory as long as the .rpak file is loaded.
.starpak files are another file format created by Respawn to complement the .rpak file format.
They contain streamed asset data, saving hardware resources by only loading the data when needed.
The most common example of streamed asset data is high resolution textures. The low resolution versions are kept permanently loaded in a .rpak file, whilst the higher resolution versions are loaded as needed.
RePak First-Time Setup
The lastest RePak release can be downloaded from here. Once it has been downloaded, it is recommended to set up your file structure as follows:
RePak
├── RePak.exe
├── repak_map.json
└── assets
RePak: the base folder where your RePak/RPak related files goRePak.exe: theunzippedfile you downloaded from GitHubrepak_map.json: the repak map you will use, you can name this json whatever you wantassets: the folder where you will put your various different images and folders, used to create your RPaks
see Repak for more info on how to setup your repak map
Using the RPak in a mod
Create the basis of the mod using the Getting Started guide.
Inside the mod's folder, create a new folder, called paks. Move your .rpak file (and .starpak files if you have any) into the folder.
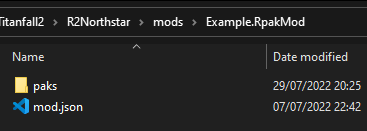
Inside the paks folder that you created, make a new .json file called rpak.json.
In this example, the camo_skin04_col.rpak rpak is completely replaced by example.rpak.
This is fine for camo RPaks, but isn't suitable for more complex RPaks
{
    "Preload":
    {
        "example.rpak": false
    },
    "Aliases":
    {
        "camo_skin04_col.rpak": "example.rpak"
    },
    "Postload":
    {

    }
}
Preload: if set totruethis makes RPaks get loaded as soon as possible.Aliases: this completely replaces the RPak with the specified RPak. In this examplecamo_skin04_col.rpakis replaced byexample.rpak.Postload: this makes RPaks get loaded directly after the specified RPak.
Preload
This field tells Northstar whether or not to load a specific RPak as soon as RPak loading starts.
The field is a boolean. (true or false) and should be formatted like "<target_rpak>": true or "<target_rpak>": false
Example: "my_new.rpak": true
Aliases
This field tells Northstar that a specific RPak should never be loaded, and a different RPak should be loaded instead.
The field should be formatted like "<target_rpak>": "<replacement_rpak>"
Example: "common.rpak": "my_new.rpak"
Postload
This field tells Northstar that a specific RPak must be loaded directly after another specified RPak has finished loading.
The field should be formatted like "<target_rpak>": "<rpak_to_load_after>"
Example: "my_new.rpak": "common.rpak"
Warning
If an asset in your RPak references another asset, it must be loaded after the asset that it references, or the game will infinitely loop when launched.
This is mostly a problem for matl assets, txtr assets don't reference other assets.
The file structure of your paks folder should be similar to this:
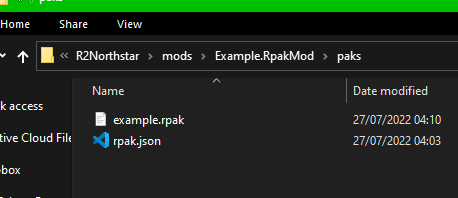
paks
├── example.rpak
├── example.starpak
└── rpak.json
example.rpak: this is the RPak file that you made.rpak.json: this controls how the game loads your RPak files
After rpak.json is set up correctly, your RPak mod should be complete and functional!
Note
If when you test the rpak the colour looks weird, use SRGB in the .dds compression, or use non-SRGB if you were already using SRGB